


Install Cloudflared on RHEL
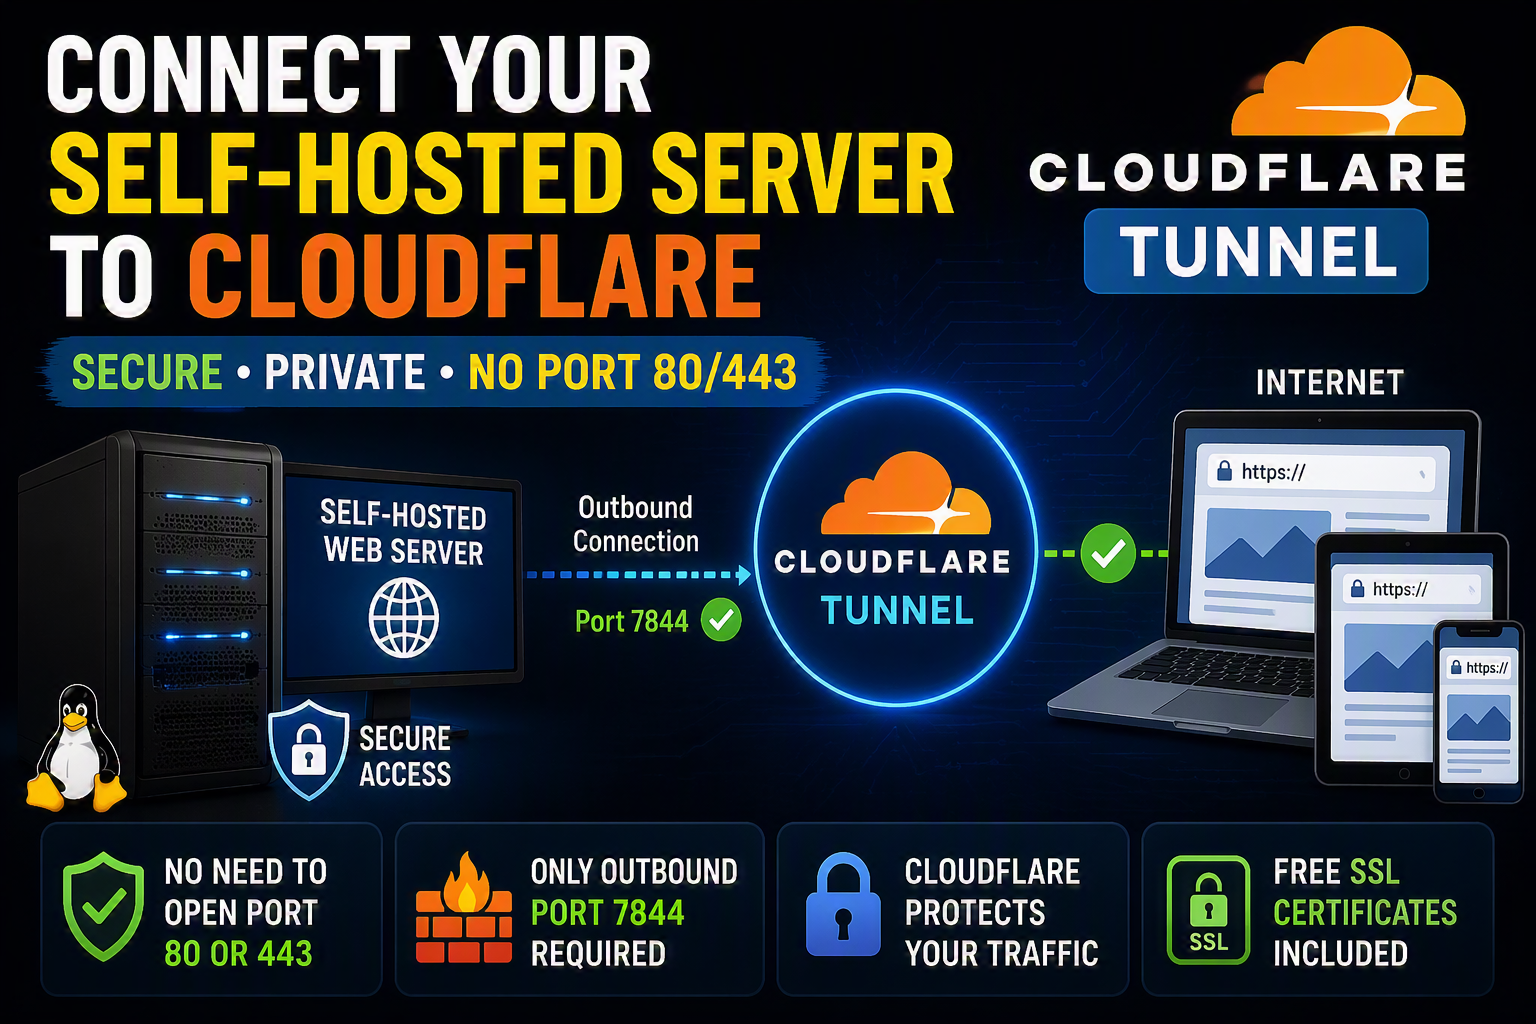
In this blog, I’ll show you how to connect a self-hosted server to Cloudflare Tunnel using Cloudflare’s Cloudflare Tunnel (Cloudflare Tunnel) on RHEL. If you host a website from your home lab or a private server, one of the biggest challenges is making it accessible from the internet without exposing unnecessary ports to the public. Cloudflare Tunnel is a great solution for this. Instead of opening ports 80 and 443 on your router or firewall, your server creates an outbound connection to Cloudflare. Cloudflare then securely publishes your website to the internet. In this guide, I’ll show you how I connected my self-hosted web server to Cloudflare Tunnel.
Why Use Cloudflare Tunnel?
Using Cloudflare Tunnel provides several benefits:
- No need to expose ports 80 or 443 to the internet
- Added layer of protection between your server and visitors
- Free SSL certificates through Cloudflare
- Easy setup for home labs and self hosted applications
- Helps reduce direct attacks against your public IP address
The only port you typically need to allow through your firewall is 7844, which Cloudflare uses for tunnel connections. If you are using a firewall, make sure outbound traffic on port 7844 is allowed. Unless you need local access directly to the web server, you do not need to expose:
- Port 80 (HTTP)
- Port 443 (HTTPS)
This is one of the biggest advantages of using Cloudflare Tunnel.
Create a Tunnel in Cloudflare
Log in to your Cloudflare dashboard.
Navigate to: Zero Trust –> Networks –> Tunnels & Mesh –> Create a Tunnel –> Cloudflared
Enter a tunnel name: homelab-website
Click Save Tunnel
Next, choose your operating system. For this example, I am using Red Hat Enterprise Linux. Cloudflare will generate installation commands for your server.
curl -fsSl https://pkg.cloudflare.com/cloudflared.repo | sudo tee /etc/yum.repos.d/cloudflared.repoUpdate repositories and install Cloudflared. If SELinux is enabled, allow system services to initiate outbound network connections:
sudo yum update
sudo yum install cloudflared
sudo setsebool -P nis_enabled 1
Install the Cloudflare Tunnel service using the token generated by Cloudflare. Verify the service is running:
cloudflared service install xyzxabcdx1234xaaxxaaxxaabbaaccaa888aaazzaassaa
systemctl status cloudflared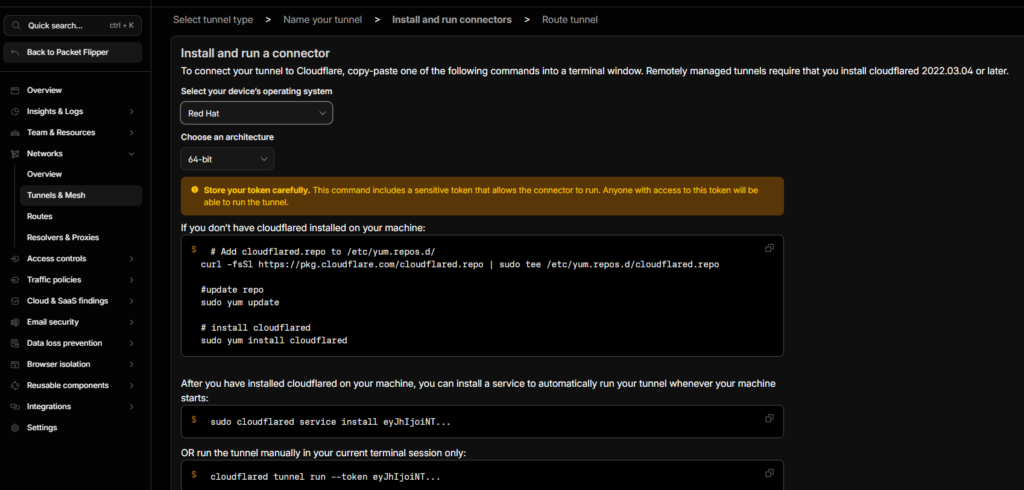
If the Service Installation Fails
Sometimes the service installation may not work properly. In that case, run the tunnel directly using the token:
cloudflared tunnel run --token xyzxabcdx1234xaaxxaaxxaabbaaccaa888aaazzaassaaIf the tunnel starts successfully, you can continue with the configuration in Cloudflare.
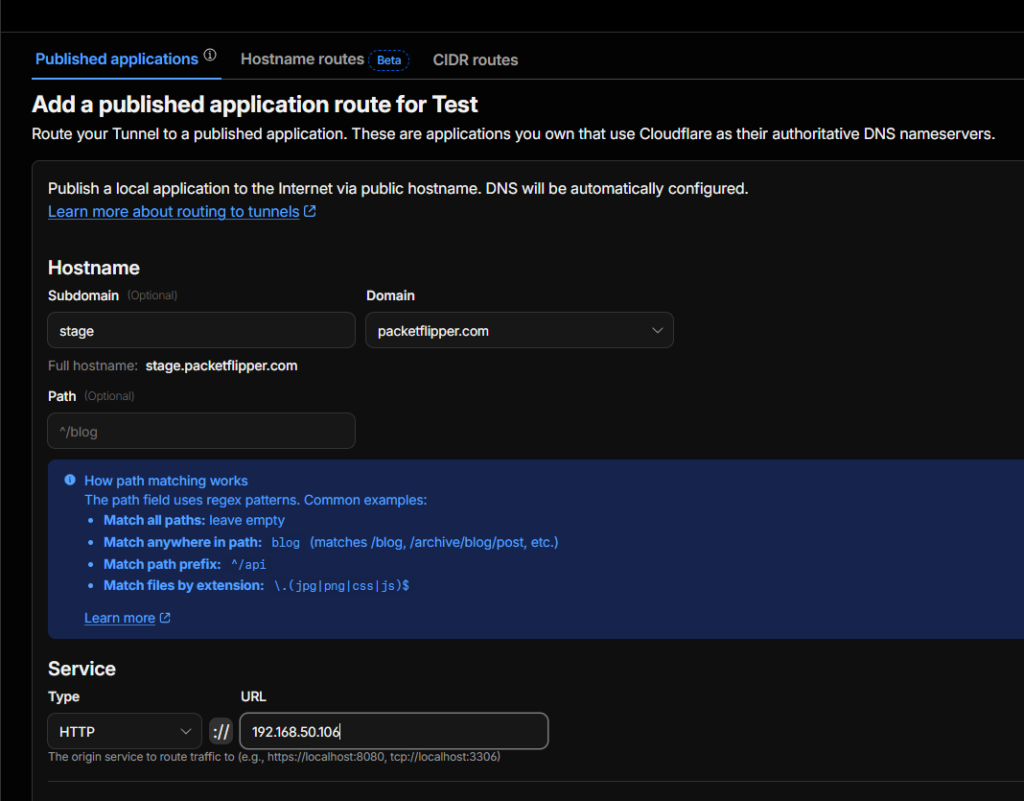
Configure the Public Hostname
Back in Cloudflare Zero Trust, configure your public hostname. From the Domain section, you can either:
- Select your root domain
- Create a subdomain
Example: blog.packetflipper.com
Service Type
Select the protocol your application uses. For example: HTTP, HTTPS, TCP, SSH. For a web server, select either HTTP or HTTPS.
Service URL
Enter the local address of your web server. For example: http://192.168.1.106 or https://192.168.1.106. If your website uses a custom port, include the port number, such as http://192.168.1.106:8080 or https://192.168.1.106:8443. Complete the setup and save the configuration.
Verify the Tunnel
After the setup is complete, return to the Tunnel dashboard. You should see the Healthy form status column.
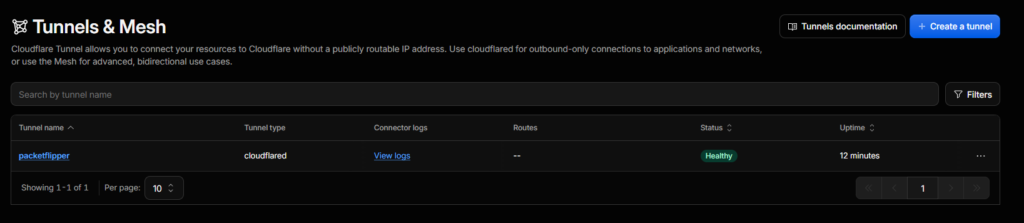
If the tunnel status shows Healthy, open your public URL in a browser. Your self-hosted website should now be publicly accessible through Cloudflare. If the status is not healthy, double-check:
- Firewall rules
- Tunnel token
- Service status
- Local application URL
- DNS configuration
Most tunnel issues are caused by one of these settings.
Troubleshooting
1. Self Signed SSL Certificates
If your website uses a self signed SSL certificate, Cloudflare may fail SSL verification. One option is to remove SSL from the local application and allow Cloudflare to handle SSL publicly. For many home lab environments, this is the easiest solution. There are also ways to configure Cloudflare to accept self signed certificates, but that requires additional configuration. In a future post, I will show how to configure Cloudflare so visitors are automatically redirected to HTTPS even if they enter an HTTP URL.
2. Website Redirects to a Local Hostname
Another common issue occurs when the website is configured with an internal hostname. For example, website.homelab.local or 192.168.1.106 when you access the site through Cloudflare, you may get redirected to the internal hostname instead of the public domain. To fix this:
- Update the website configuration
- Update Apache virtual host settings
- Replace local hostnames with the public domain name
Once updated, visitors should remain on the public URL.
Cloudflare Tunnel is one of my favorite ways to publish self-hosted applications to the internet securely. It eliminates the need to expose web server ports directly and adds an extra layer of security between your server and the public internet. The setup is straightforward:
- Create a tunnel in Cloudflare.
- Install Cloudflared.
- Configure the public hostname.
- Verify the tunnel status.
- Test the website.
Within just a few minutes, you can make your home lab website publicly available without opening inbound web ports on your firewall. For anyone running a self-hosted environment, Cloudflare Tunnel is definitely worth considering.
Upcoming Cloudflare-related topics:
- How to force a website to use HTTPS
- How to enable two-factor authentication for website admin using Cloudflare
- Create a custom domain email address using Cloudflare and Gmail.